I recently purchased a 3rd party expansion bay caddy (replacement part AK868AA) for my HP EliteBook 8350p laptop so I could have two HD's as well upgrade my original HD to a 7200rpm larger drive. I would end up installing the new HD as my primary and use the original as a secondary "data" drive for music, videos, VM's and other large files.
I purchased the expansion bay caddy from a 3rd party company (NewmodeUS.com) off of their eBay store and had no problems with the transaction. Upon receiving the caddy I also noticed that there were no instructions but really how hard can it be right?
Actually I did have one issue when I went to install the caddy into the laptop, it involved a little extra work so I found. Below is the process I used to install the HD into the caddy and into my laptop. It does not explain how to remove the original HD and replace it with the new HD. HP has manuals for that on their site.
The following steps are done at your own risk and I cannot take any responsibility if any damaged is caused by you or to your laptop. To make things easier my laptop was sitting with the battery compartment facing up or away from me.
Step 1: Remove the battery from the laptop.
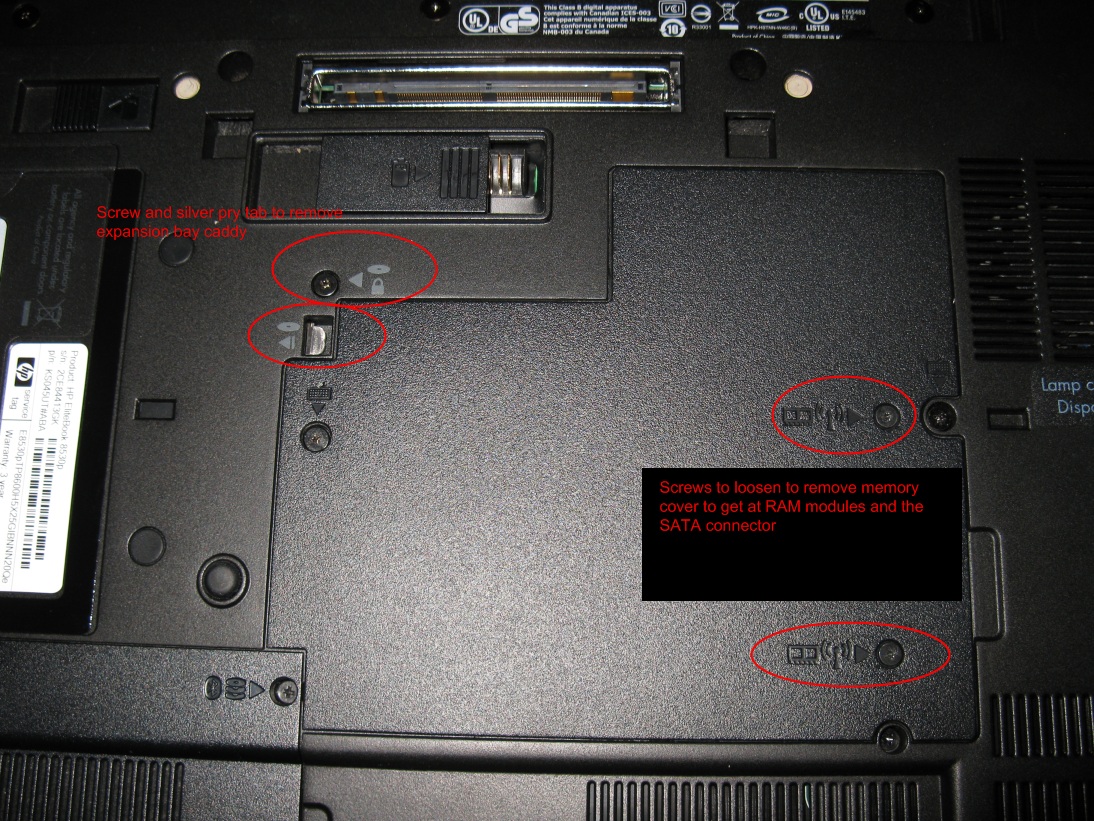
Step 2: Remove the original expansion bay caddy (the one that holds the DVD player) by unscrewing the screw that fastens the expansion bay caddy to the laptop chassis and using a flat head screw driver push on the silver tab in the picture to the left to pop the caddy out far enough so you can remove it (see image below as a reference).

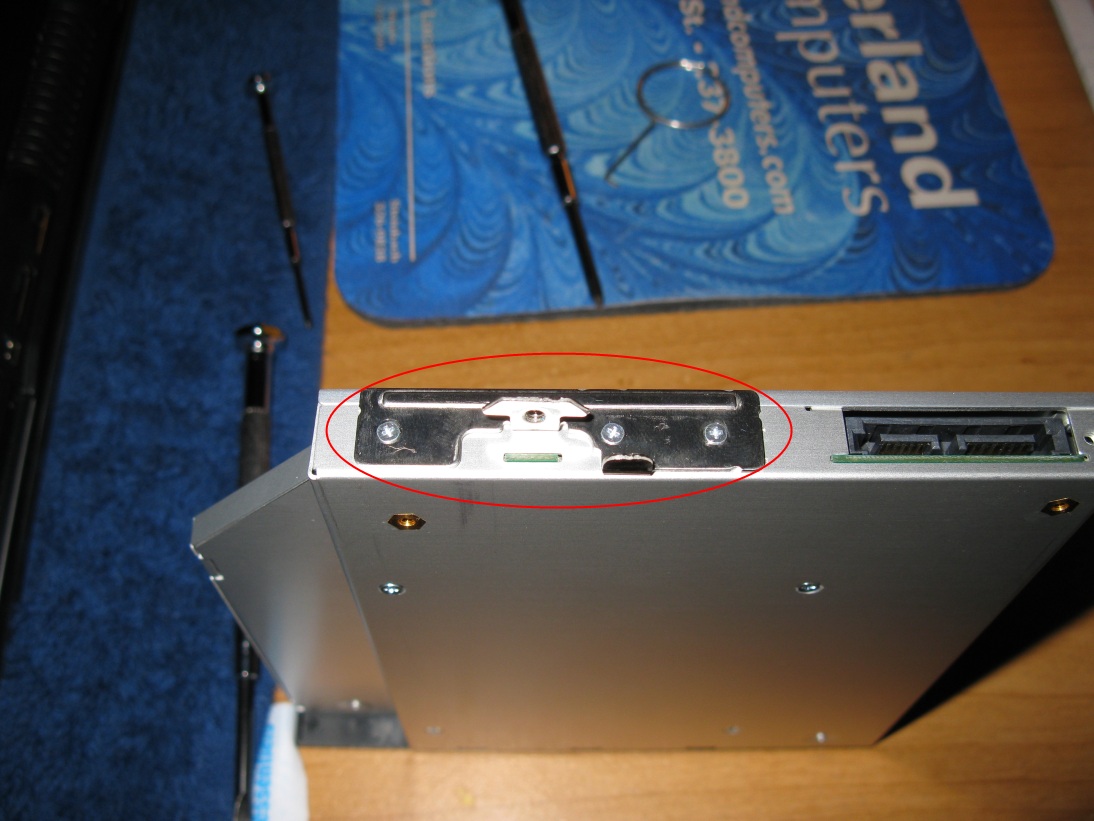
Step 3: Prep your new expansion bay caddy by installing your new hard drive, make sure to screw the HD to the caddy and transfer the fastening mounting bracket from the existing caddy to your new caddy using the supplied screws

Step 4: Use 3 screws from the supplied screws and fasten your new expansion bay cover, there are 3 screw holes on the bottom of the expansion bay caddy so that the case stays closed.
Step 5: Slide the expansion bay caddy into the expansion bay is flush with the laptop case or until you feel it cannot go in anymore. The silver tab you pried to release the caddy should be visible in the slot, if you do not see the little silver tab then you may have to follow steps 6 - 9.
Step 6: Remove the memory cover by unscrewing two screws pictured below and lift and slide the cover to the right.

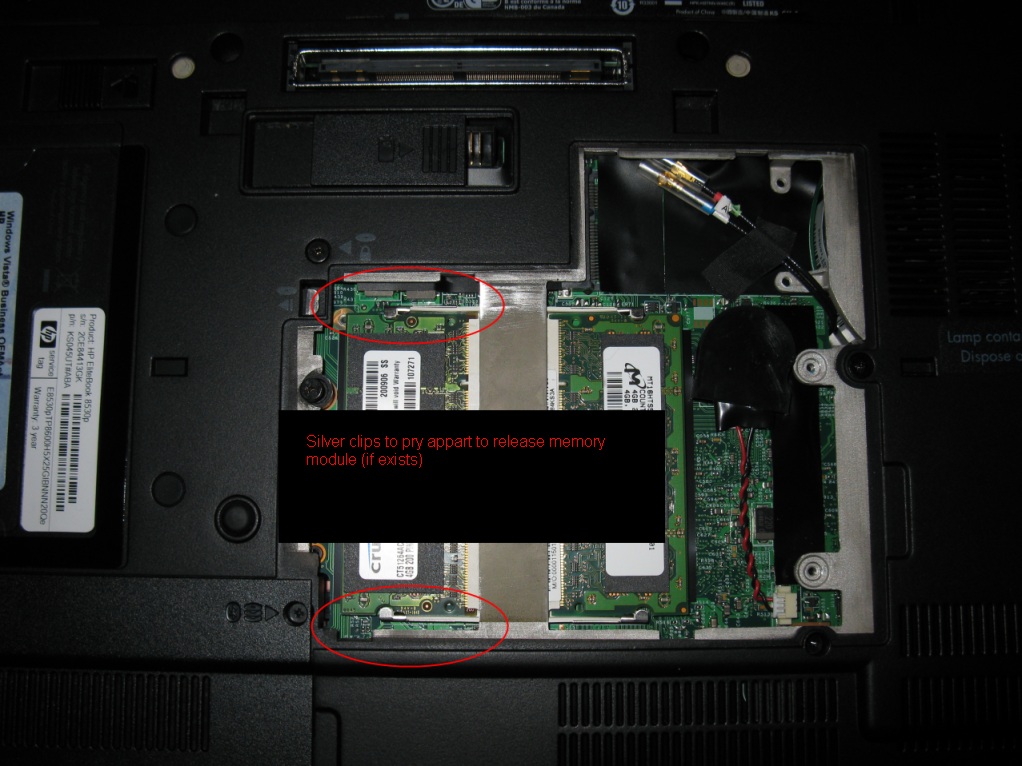
Step 7: If you have memory in the bay closest to the expansion bay caddy (left memory bay) you might want to remove it by prying the two sliver retainers on each end of the RAM module away from the center of the RAM module, the RAM module will pop up at an angle so you can remove it.

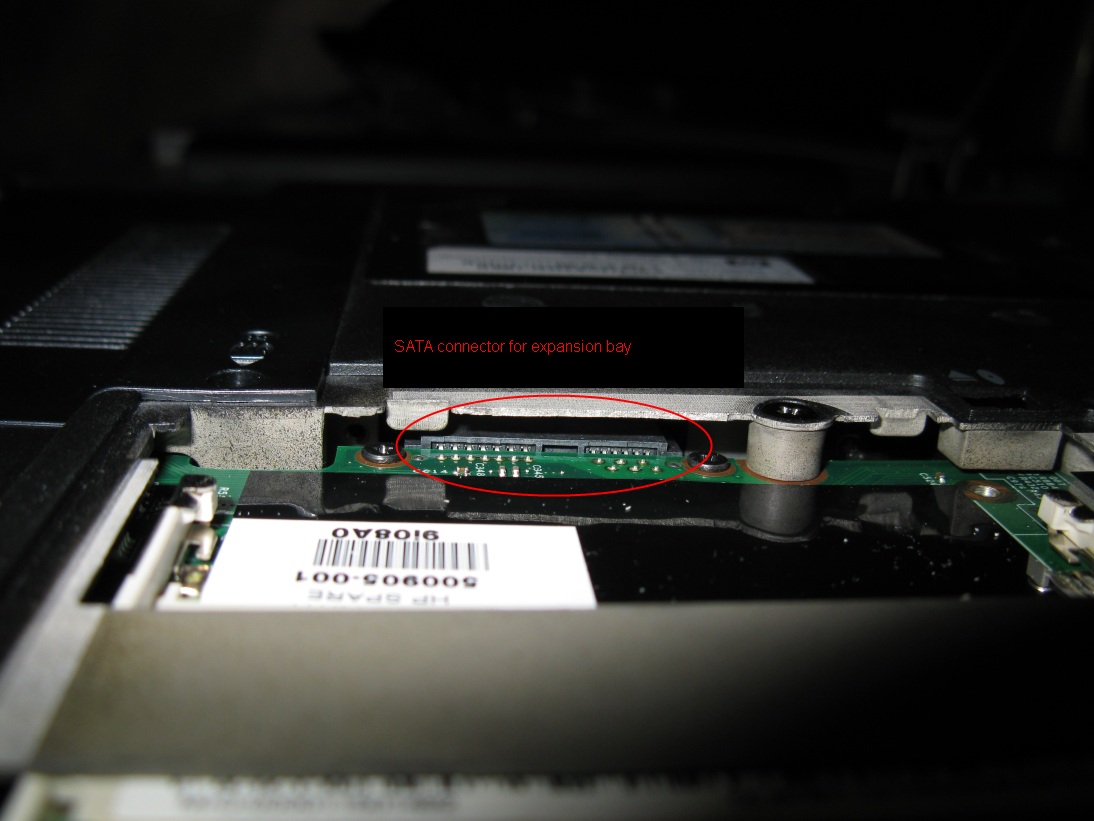
Step 8: If you look at the picture below you will see the grey connector (circled in red), this is the expansion bays SATA connector (do this by looking inside of the laptop at an angle toward the expansion bay slot).

Step 9: Slide the expansion bay caddy into the slot until it stops. Slide the flat head screw driver under the chassis so that it rests on the SATA connector then lift up on the screwdriver using the chassis as a leverage point so you can carefully push the SATA connector downwards slightly. At the same time push the expansion bay caddy in. The caddy should slide the rest of the way in (it did in my case but your mileage may vary based on the laptop model). You now should see the little silver tab you had to pry to get the DVD player out.
Step 10: Once this is done screw the fastening screw down and put back all the covers/memory/screws you removed.
Turn on your laptop and hopefully you should see your new drive.
Note: if you were like me and you made the new HD your primary drive and used the original HD as the drive to go in the expansion bay you will need to go into the BIOS and make sure the expansion bay device is NOT the first device to boot from in the list. If you don't well your old HD will boot.
Note: Because the second drive is not buried in the laptop you will notice the noise when the second drive is being accessed, it is no way louder than the DVD drive when being accessed but you will notice it if you are copying large or a large amount of files to and from it.